[E-mail] Screen
Overview
Configure this setting when sending scan data by email.
This function allows you to set an address, email title or text, and sender address.
The address can be selected from the list of pre-registered addresses or entered directly. Additional addresses can also be registered.

- An administrator email address must be registered in order to use the email function of the system. For details, refer to [Administrator Registration].
- This item is displayed on a product equipped with a scanner and HDD. For details, refer to What Is the [SCAN]?.
- It is convenient to pre-register frequently used addresses. For details about how to register an address, refer to [Scan Address Register].
Specifications
Category | Copy / Scan | ||
Location | Machine | Touch Panel | |
Printer driver | - | ||
Application | - | ||
Required options | - | ||
Required items | - | ||
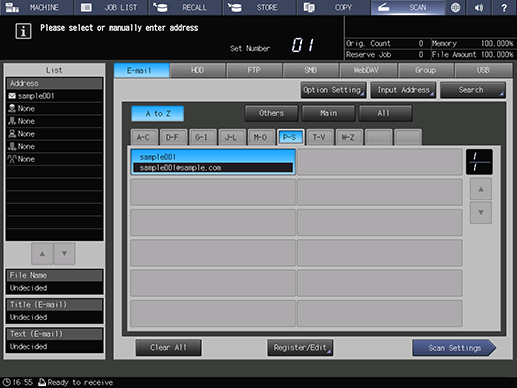
Setting items | Address key | Displays the registered addresses. Press the key to select an address. Multiple addresses can be selected. | |
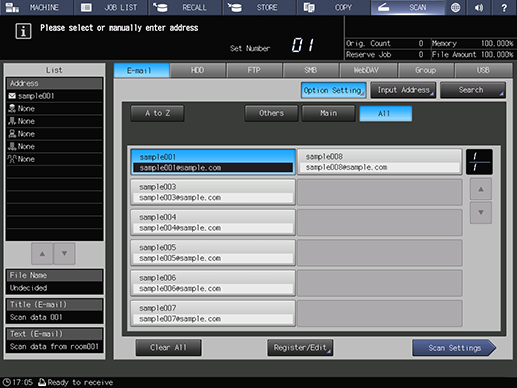
[Option Setting] | Sets the title or text of the email to be sent, as well as the sender address. For details, refer to [Option Setting]. | ||
[Input Address] | Manually enter an address. Set this item when sending a job to an unregistered address. For details, refer to [Input Address]. | ||
[Search] | Searches for the target address from the registered addresses. For details, refer to [Search]. | ||
[A to Z] | Displays a list of addresses for which [Reference Name] is registered with alphabetic characters. | ||
[Others] | Displays a list of addresses for which [Reference Name] is registered with characters such as symbols other than alphabetic characters. | ||
[Main] | Displays a list of frequently used addresses that are registered in [Main]. | ||
[All] | Displays all of the registered addresses. | ||
[+] / [,] | Switches the address list page. Up to 12 addresses are displayed on each page. | ||
[Clear All] | Resets the selected address. When multiple addresses are selected using certain sending methods, they can be canceled collectively. | ||
[Register/Edit] | Registers, edits, or deletes an address. For details, refer to [Register/Edit]. | ||
[Scan Settings] | Saves the selected address, and sets scanning conditions. For details, refer to [Scan Settings]. | ||
Remarks | - | ||
Reference | - | ||
Screen access | Touch panel - [SCAN] - [E-mail] | ||
Procedure

If [E-mail] is not selected, press [E-mail].


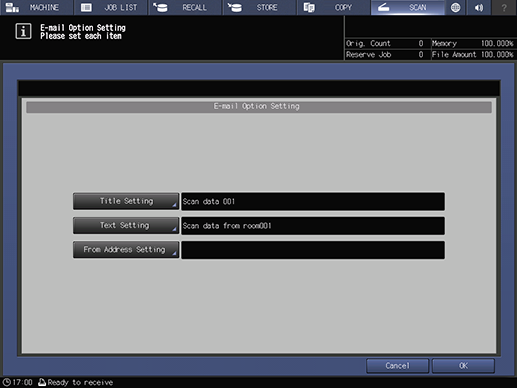
[Title Setting]: Sets the title of the email to be sent.
[Text Setting]: Sets the text of the email to be sent.
[From Address Setting]: Sets the sender address.
For details about each item, refer to [Option Setting].
When sending a message by email from this system, if the sender's email address is not set, the administrator's email address will be used as the From address. For details about the administrator's email address, refer to [Administrator Registration].


The selected address is displayed in [List] of the left pane of the screen.
Multiple addresses can be selected.
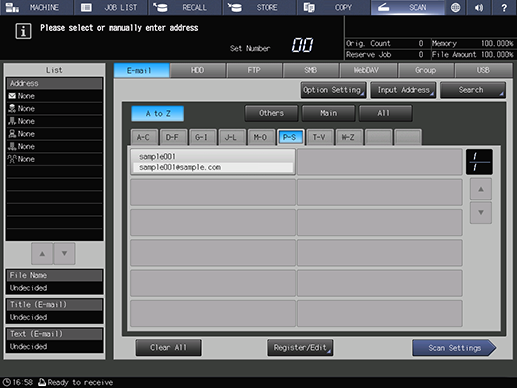
To cancel the selected address, press the selected registration name again.
Pressing [Input Address] allows you to manually enter an address. For details about how to enter an address, refer to [Input Address].
Using the search function allows you to search for an address. For details about the search function, refer to [Search].
To narrow down registration names, use [A to Z], [Others], or [Main].


[Original Setting]: Sets conditions for the original. Set the orientation and image quality of the original, and the 2-sided original.
[Quality Adj.]: Sets image quality conditions. Set the scanning density, tone, brightness, contrast, etc.
[Zoom]: Sets the zoom ratio for scanning.
[Application]: Sets application functions. Configure various settings such as erasing the outside of an original or adding a stamp.
[Color]: Sets the color mode. Set the scanner data to color, gray scale, or black and white.
[Color Space]: Select the type of RGB color space.
[Scan Size]: Manually set the range to scan the original.
[Resolution(dpi)]: Sets the resolution to scan the original.
[Simplex/Duplex]: Sets simple and duplex conditions for the original.
[File Type]: Sets the file type or password to store scan data.
[File Name]: Enter the file name for the scan data to send.
[Color Compression]: Sets the compression level for scan data.
For details about the scan conditions, refer to [Scan Settings].

Scanning starts, and the scan data is sent to the selected address.


 in the upper-right of a page, it turns into
  and is registered as a bookmark.