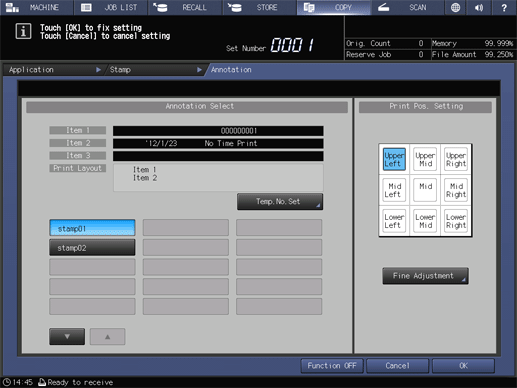
[Annotation Select]
Overview
Select the desired stamp from among the registered annotations.
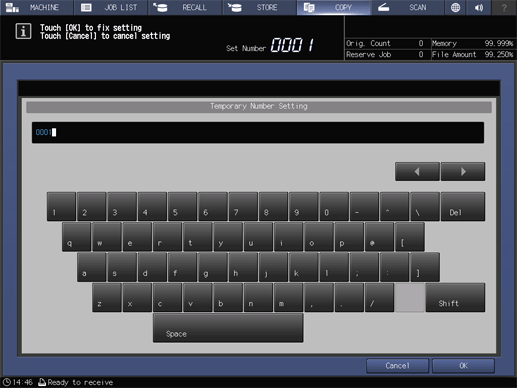
The annotation serial number can be changed temporarily, and can also be set to any starting number.
- This item is displayed on a product equipped with a scanner and HDD. For details, refer to What Is the [COPY]?.
- [Annotation] allows you to register the date and time for scanning a text string or original, as well as the sequence numbers of the originals. For details, refer to [Annotation Setting].
Specifications
Category | Copy / Scan | ||
Location | Machine | Touch Panel, Control Panel | |
Printer driver | - | ||
Application | - | ||
Required options | - | ||
Required items | - | ||
Setting items | [Temp.No.Set] | Temporarily changes the registered serial numbers. | |
Annotation key | Selects the desired annotation to be used. This item is not displayed when no annotation is registered. | ||
[,] / [+] | Switches the annotation key to display. Up to 15 annotations can be displayed in each page. | ||
Remarks | - | ||
Reference | - | ||
Screen access | Touch panel - [STORE] - [Annotation] | ||
Touch panel - [COPY] - [Application] - [Stamp] - [Annotation] | |||
Touch panel - [SCAN] - [Scan Settings] - [Application] - [Annotation] | |||
Control panel - Utility/Counter - [User Setting] - [Initial Setting] - [Scan Initial Setting] - [Application] - [Annotation] | |||
Control panel - Utility/Counter - [User Setting] - [Initial Setting] - [Store Initial Setting] - [Annotation] | |||
Procedure

The setting screen is displayed.


The serial number is changed. The number of the item for which the serial number is registered is changed, and displayed in red.
When the serial number is changed, [Temp.No.Set] is changed to [Temp.No.CLR].
Pressing [Temp.No.CLR] releases the change.
For details about how to enter characters, refer to Entering Text.


 in the upper-right of a page, it turns into
  and is registered as a bookmark.